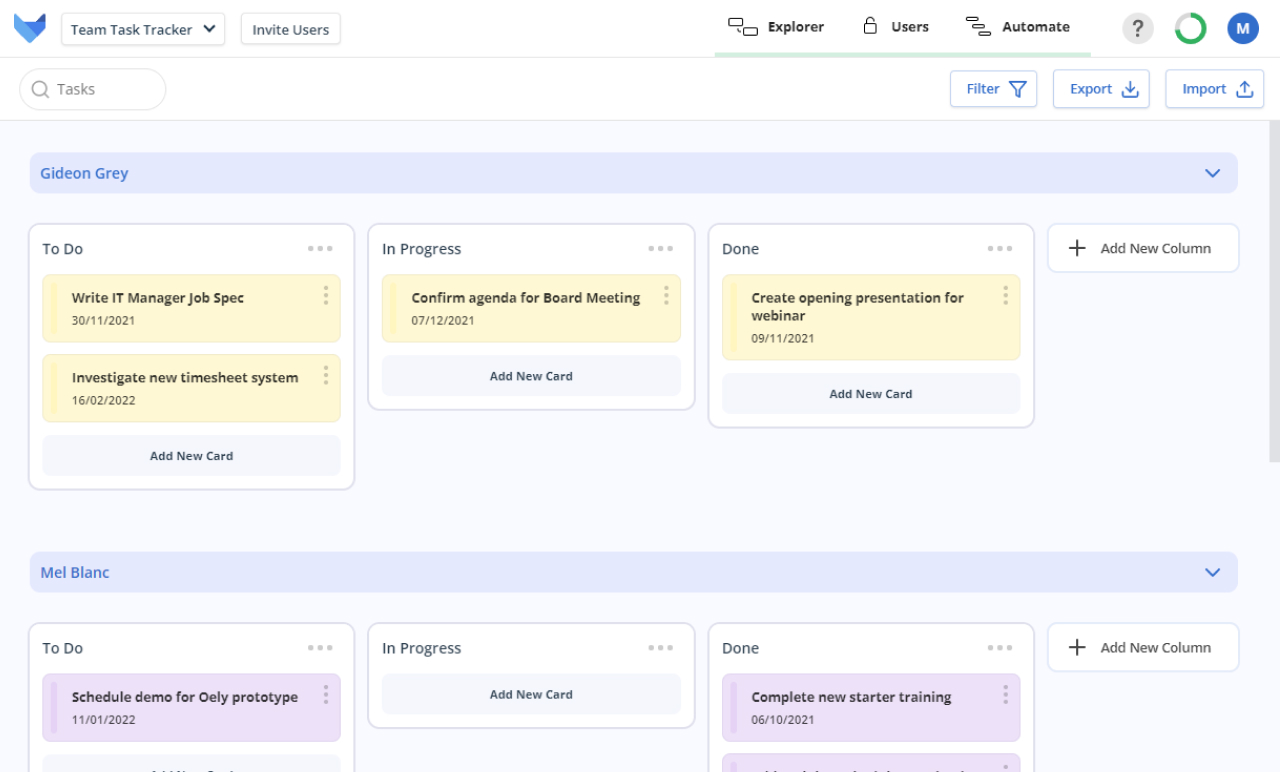
Boards, sometimes known as Kanban Boards, are a great way to visualize the status of various items simultaneously.
By grouping items into rows and columns, you can quickly track an item through various stages and get a picture of the flow of work.
Boards display records as a card, where the cards can be divided up into columns. Optionally, these columns can then be further divided into rows.
Given Boards allow you to see an overall picture of a set of Records, they are a useful tool to help manage the workload for your team.
No matter the industry you work in, or you team size, having visibility of your teammates workload and task list is beneficial. With a Gridfox Board, you can get an at-a-glance view of the progress of all your team activities, identify where there may be workload imbalances, and avoid the need for time-consuming progress update meetings.
This tutorial will cover how to setup a Project for your team’s task list. The Project can easily be configured and adjusted to match your specific team requirements.
To read about other use cases for Boards, take a look through our Board Tutorial list.
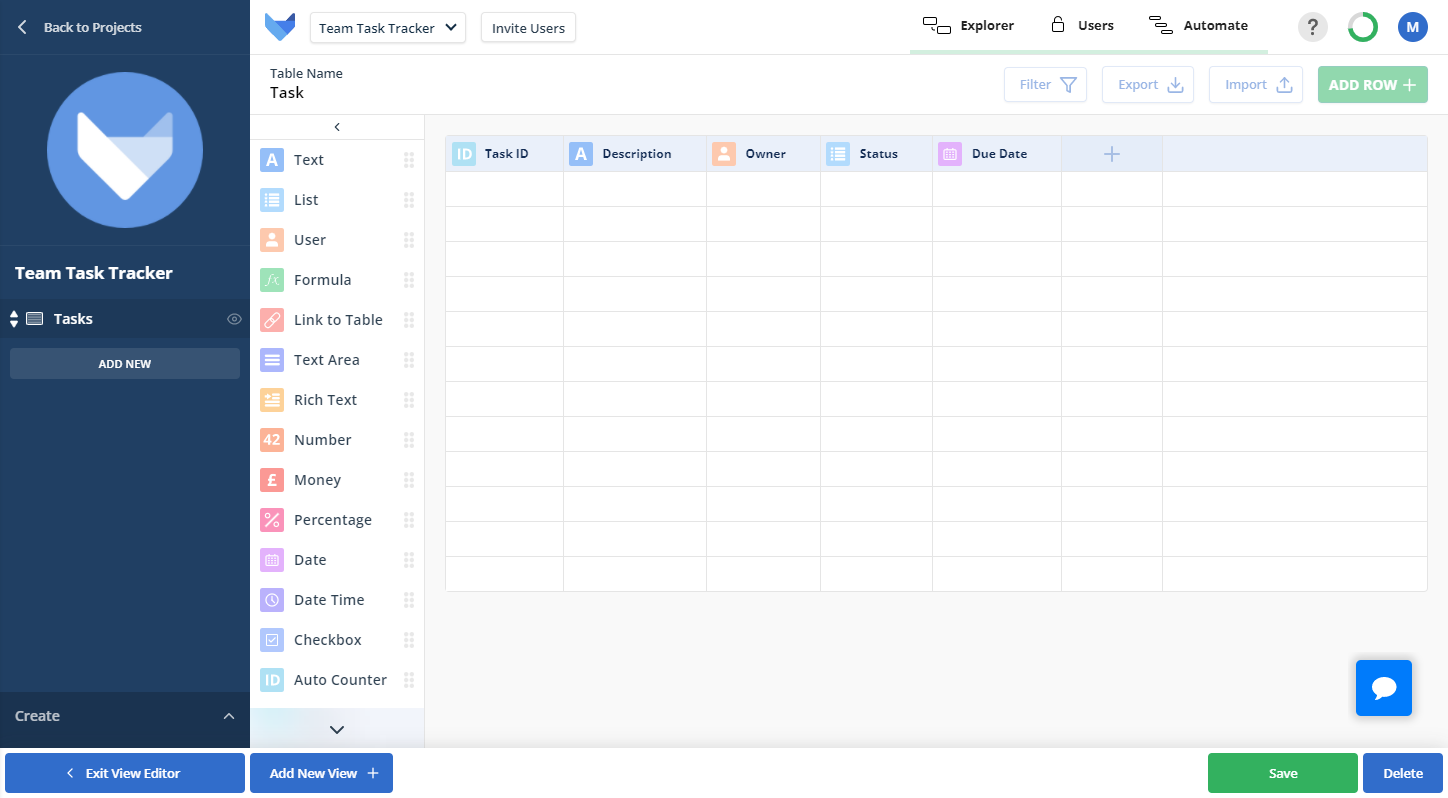
To start tracking your team activity in Gridfox, a Tasks Table firstly needs to be created to store all the information about these Tasks.
Create a new Table called Tasks
You can use the View Editor or the Explorer to do this
Add the following Fields to the Tasks Table:
If you take a look at your Tasks Table in the View Editor, it should show as below:
To make sure you can assign these Tasks to your team, they will need to be invited to the Project.
TIP
The steps below invite the team to the ‘Edit’ Group which will allow them to amend all Records in the Project. To control the permissions more granularly, set up a custom Group.
Your team members will get an email inviting them to the Project. They can start adding in their Tasks and assigning themselves as the Task Owner.
Now that the Tasks Table has been setup and your team invited, Tasks can be added into the Project.
TIP
You can follow the steps below to add tasks manually. Alternatively, you can upload a spreadsheet of your existing tasks using the import & export functionality.

Now that your Table has been setup, you can create the Task Board.
You now have a new Board View. Before it can be saved, it needs to be configured.
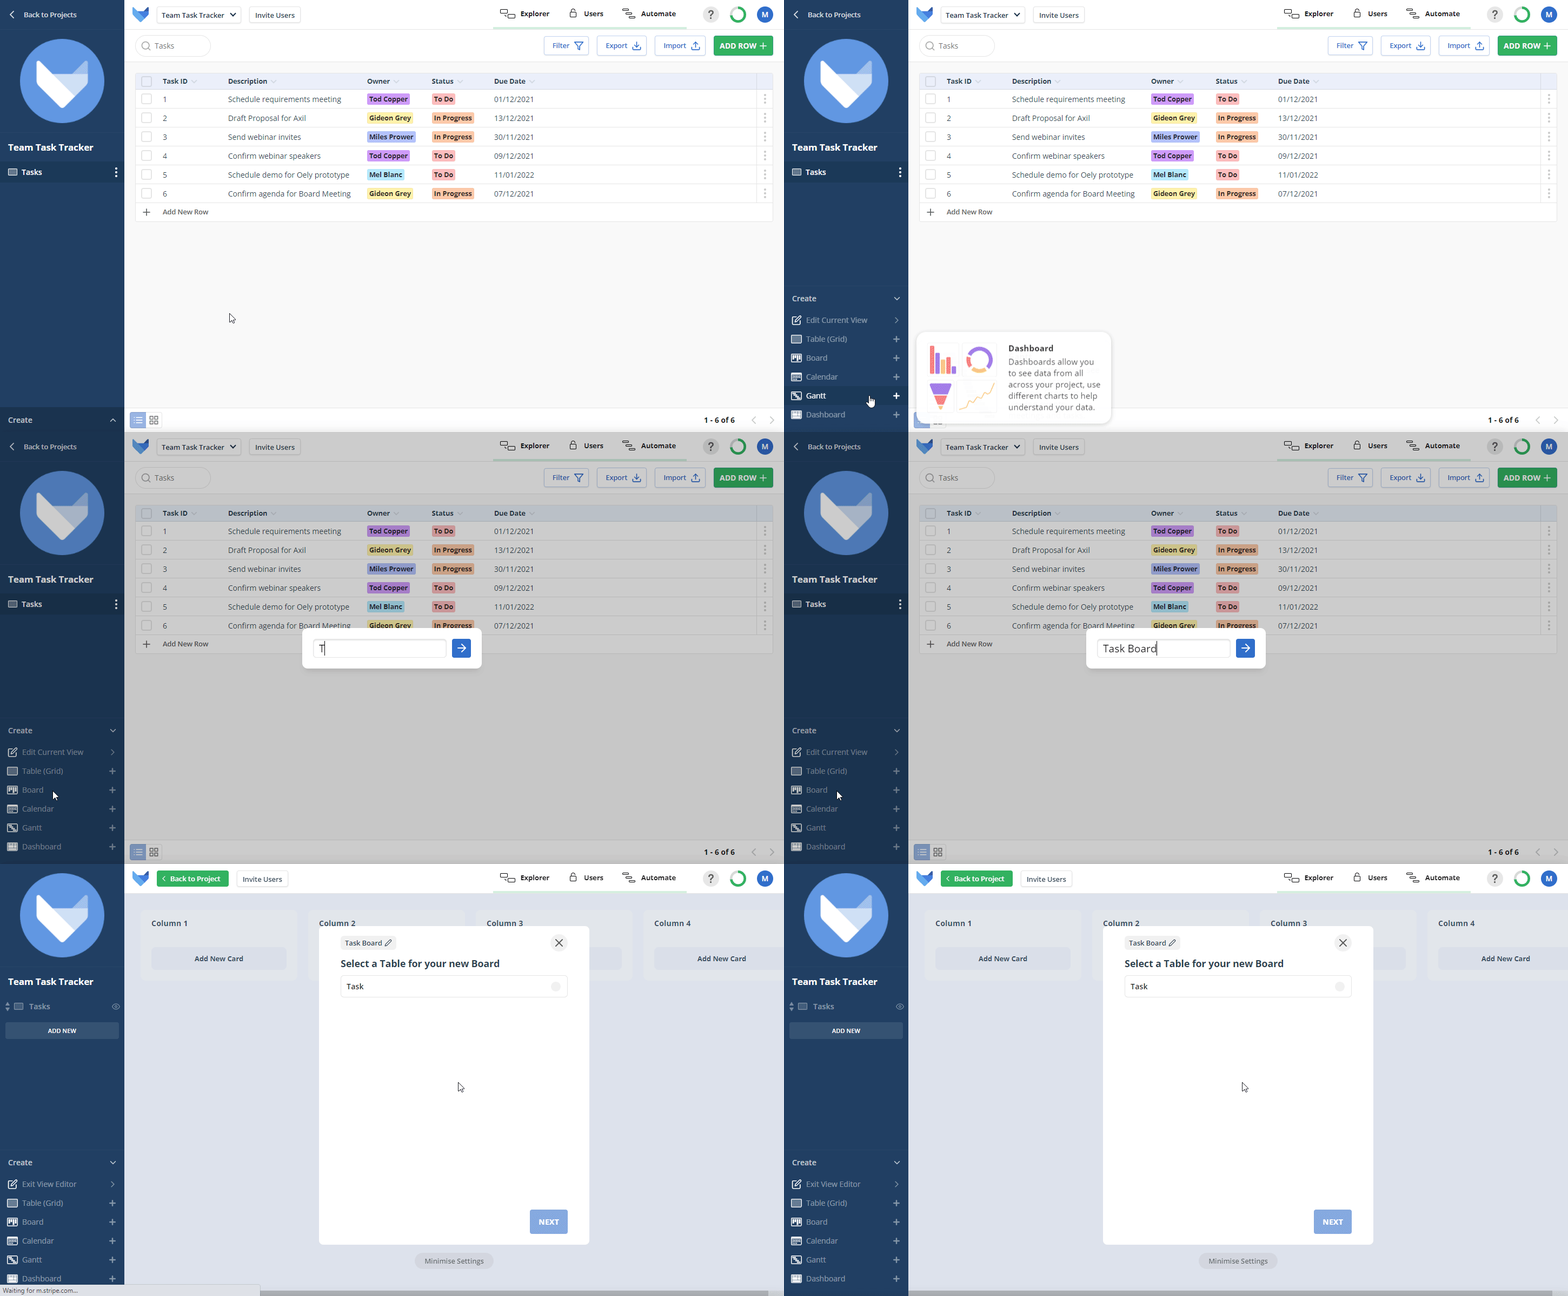
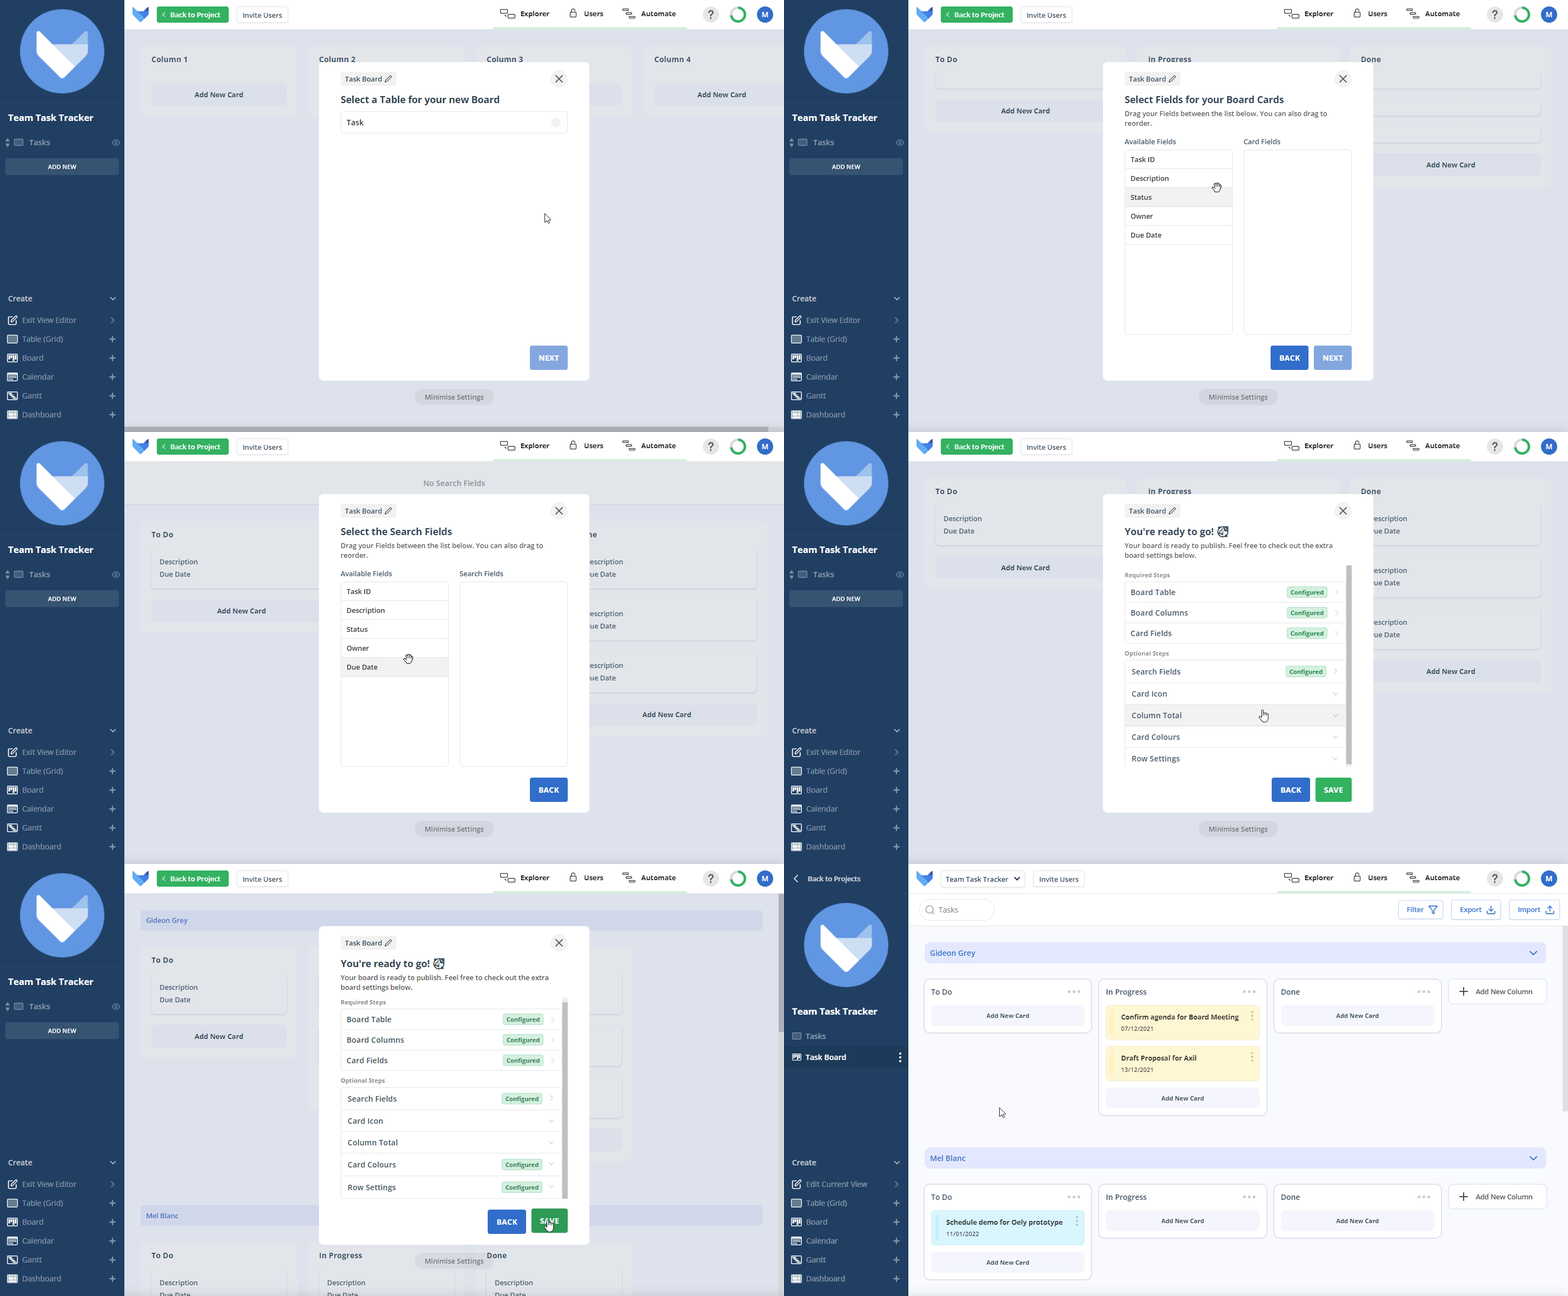
Drag the following Fields into the Card Fields section:
Then click Next
Click on Search Fields and drag the following Fields into the Search Fields section:
Then click Back
Your Board Screen is now all set up and ready for your team to use.
Your team can now use the Task Board to manage their workload.
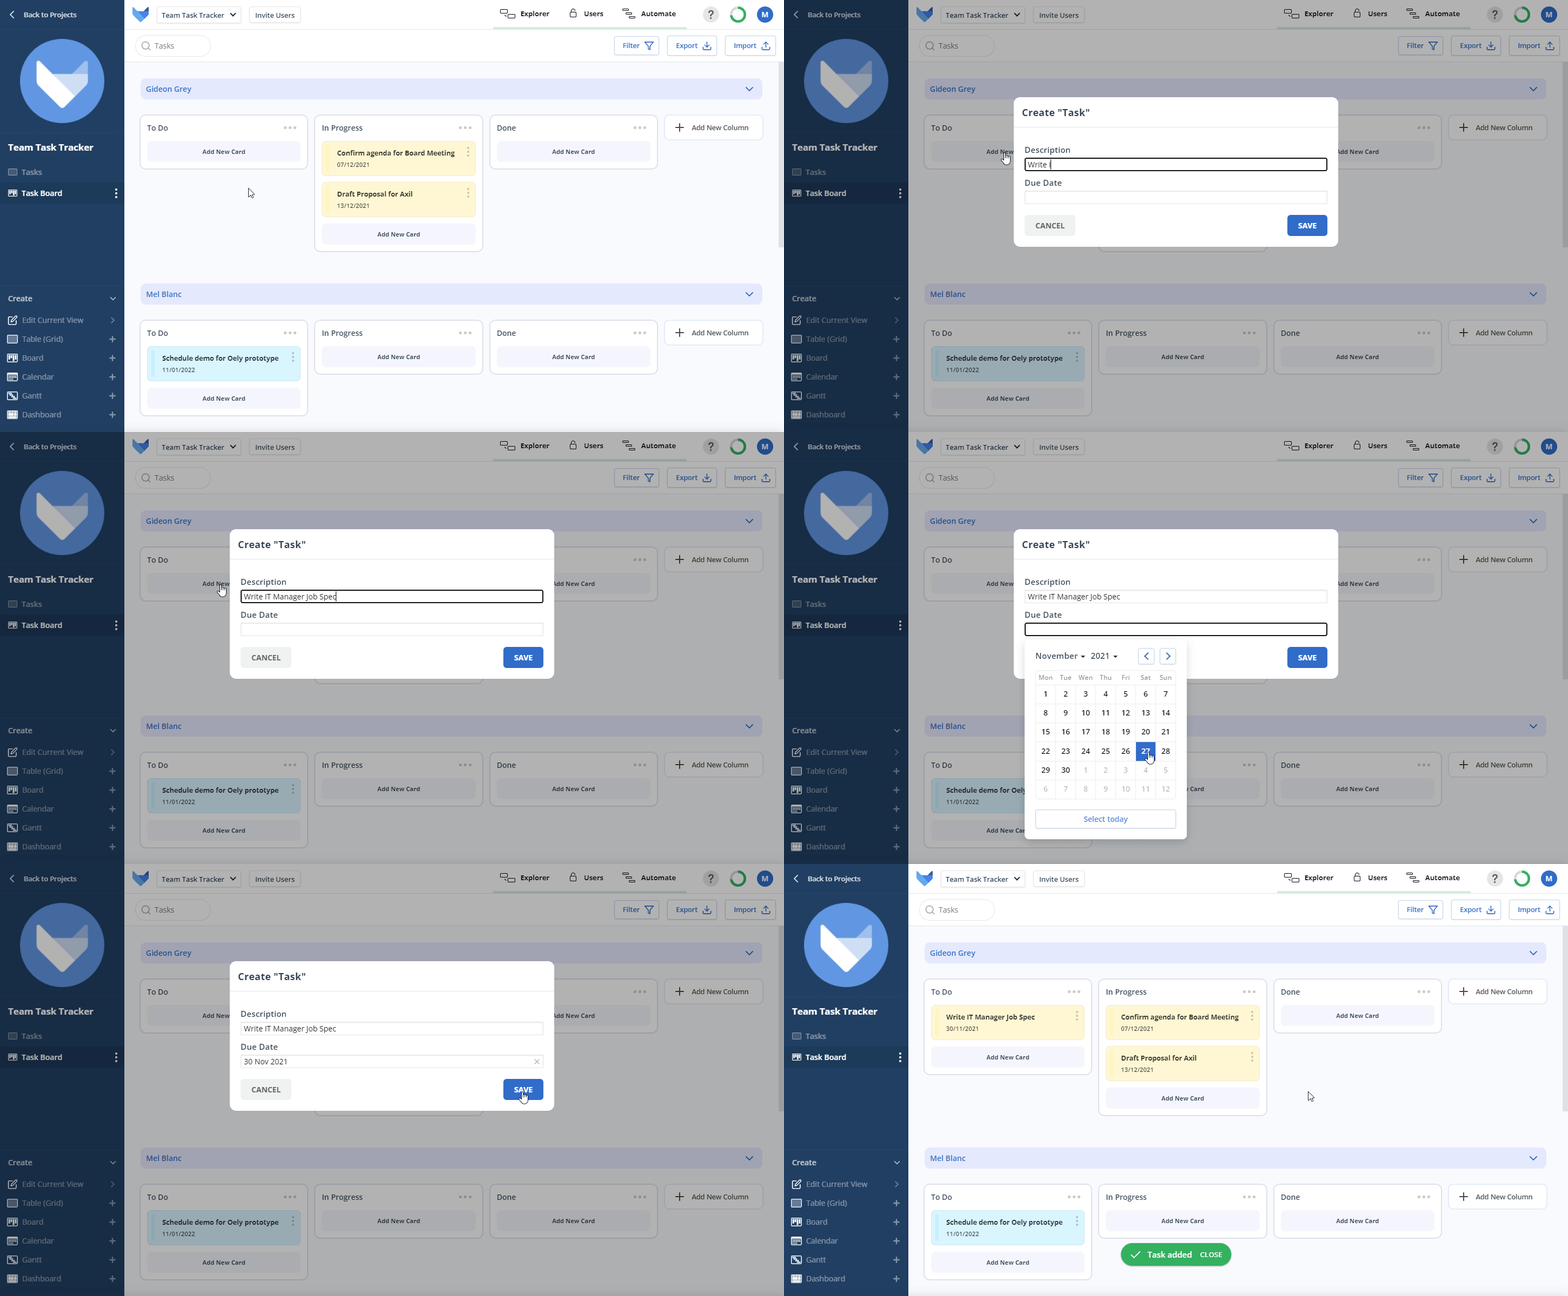
You can use the Task Board to create new Tasks for the team.
The Task will be added to the Board immediately.
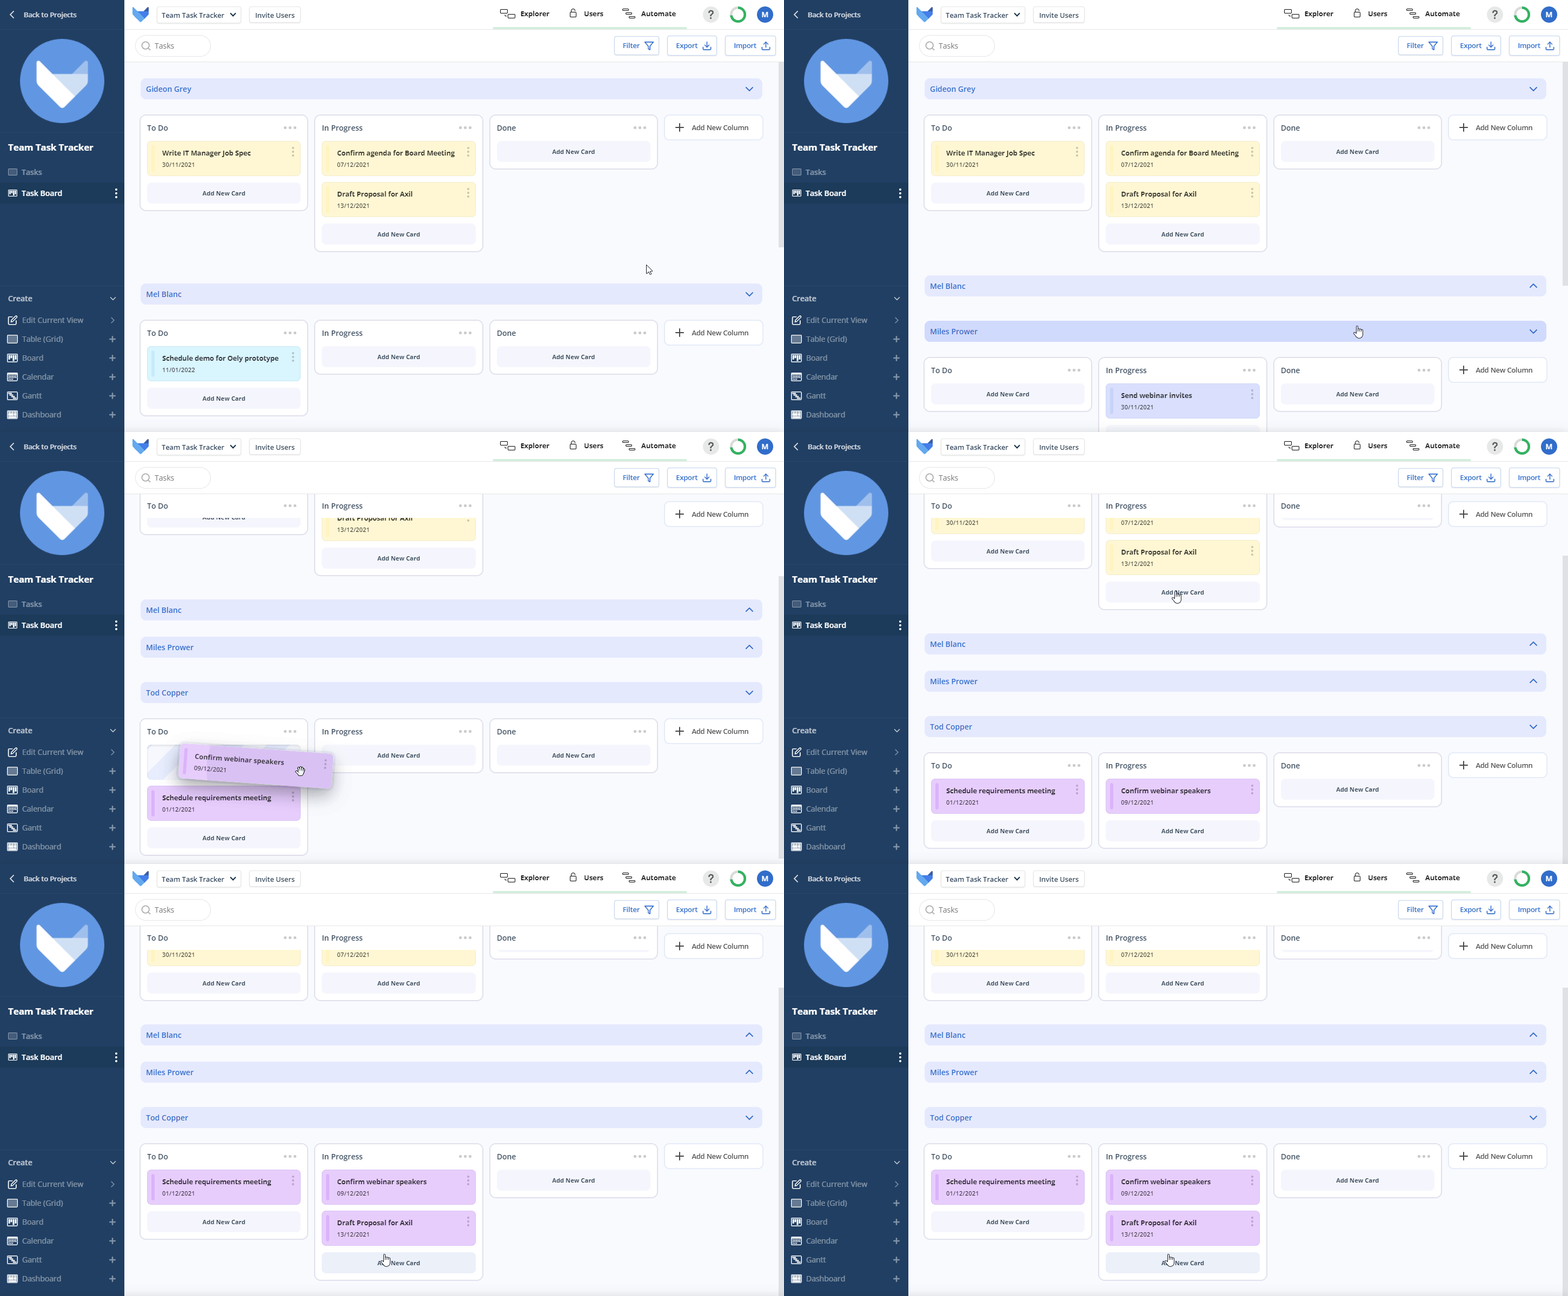
To update the status of a Task, or to reassign it to another Team member, it can be simply moved around the Board.
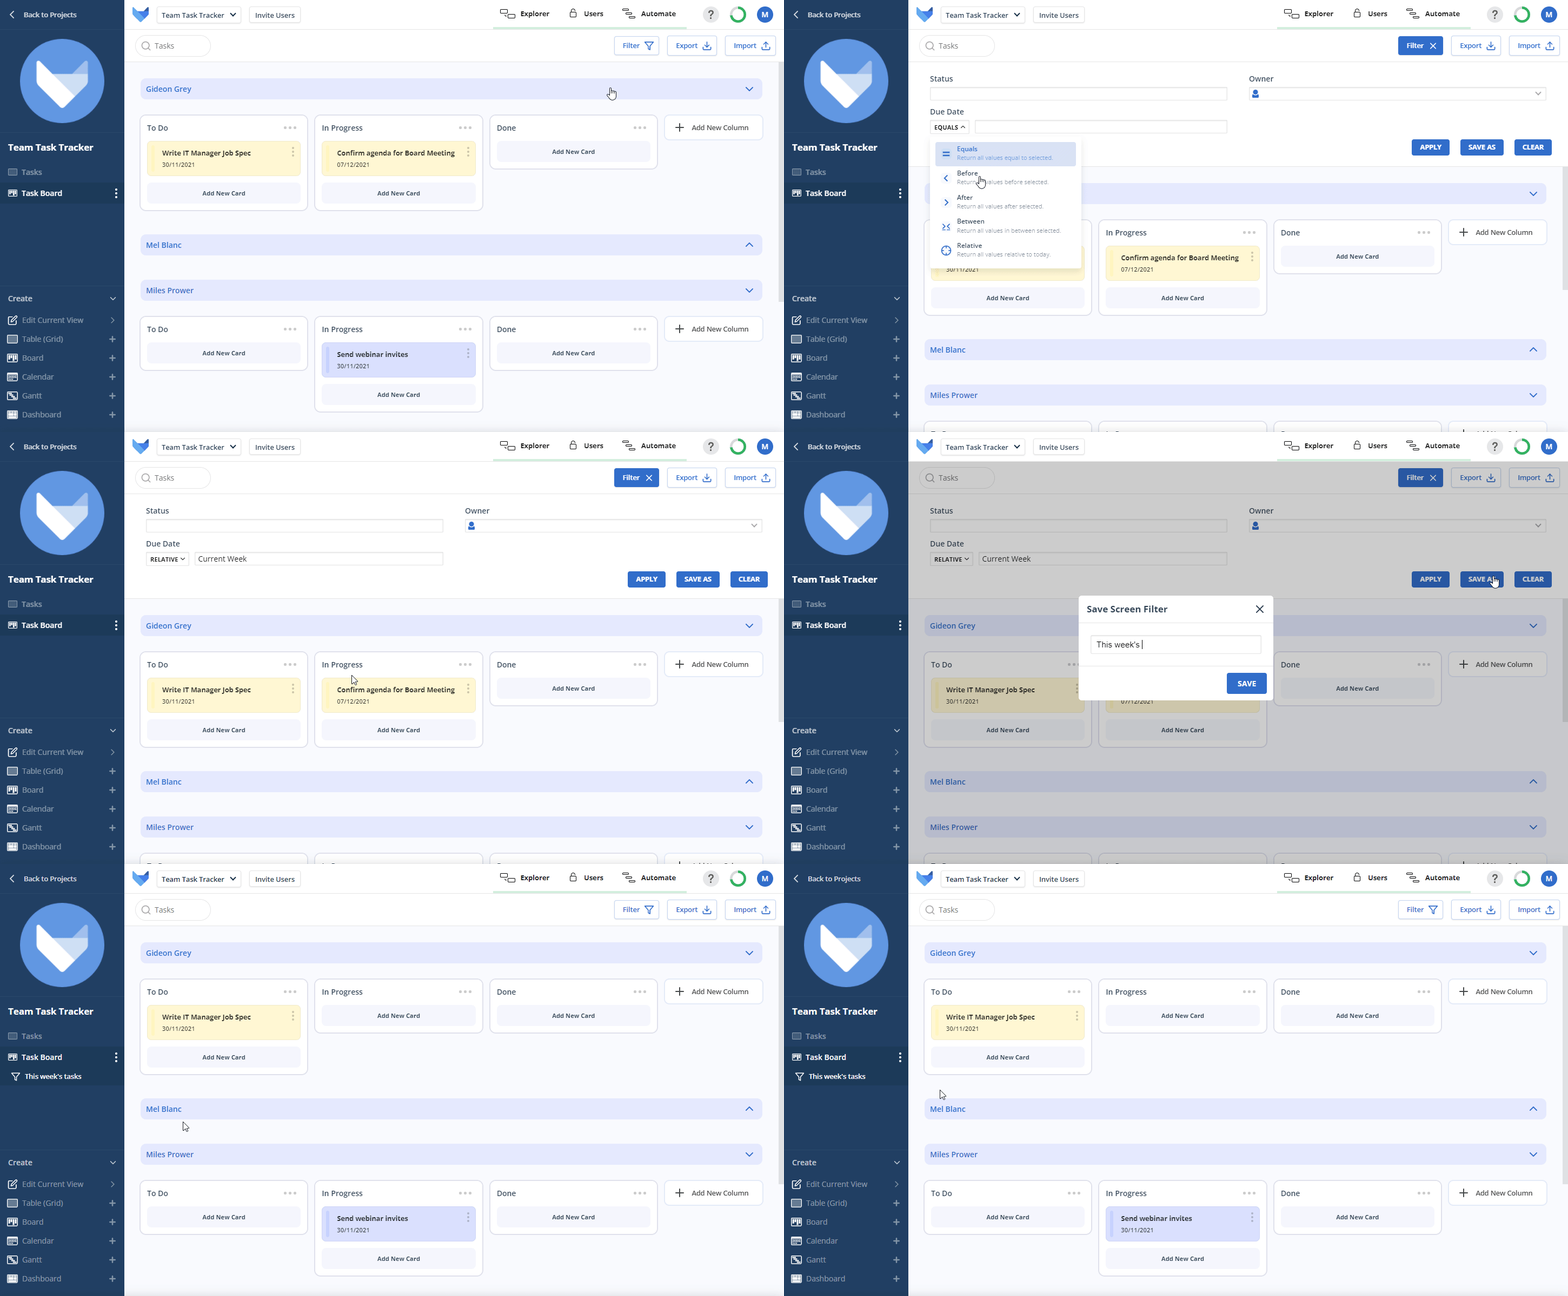
As more and more Tasks get added to the Board, you may want to use the search and filter functionality to tailor the view of Tasks that you see.
As a Project Admin of the Project, you can create filters which can then be saved for your team to use.
To help the team focus on what is most important, it may be useful to create a filter which shows all Tasks which are due this week.
The filter will now appear in the navigation bar for your team to see.
You have now created a Task Board for your team to use. They will have easy visibility of everything they are working on, as well as everything that is in flight with the team.
Customize your team’s Project by adding new Fields, creating more Views, building Workflows and adding new Tables.