Send Email Workflow Step
The ‘Send Email’ Workflow step allows you to automatically send emails to your Project Users based on Record information.
Adding a Send Email Workflow Step
First, open up the Workflow that you would like to add a Send Email Workflow Step to. Alternatively, create a new Workflow.
Drag the Send Email block onto the canvas and click the block to configure the email.
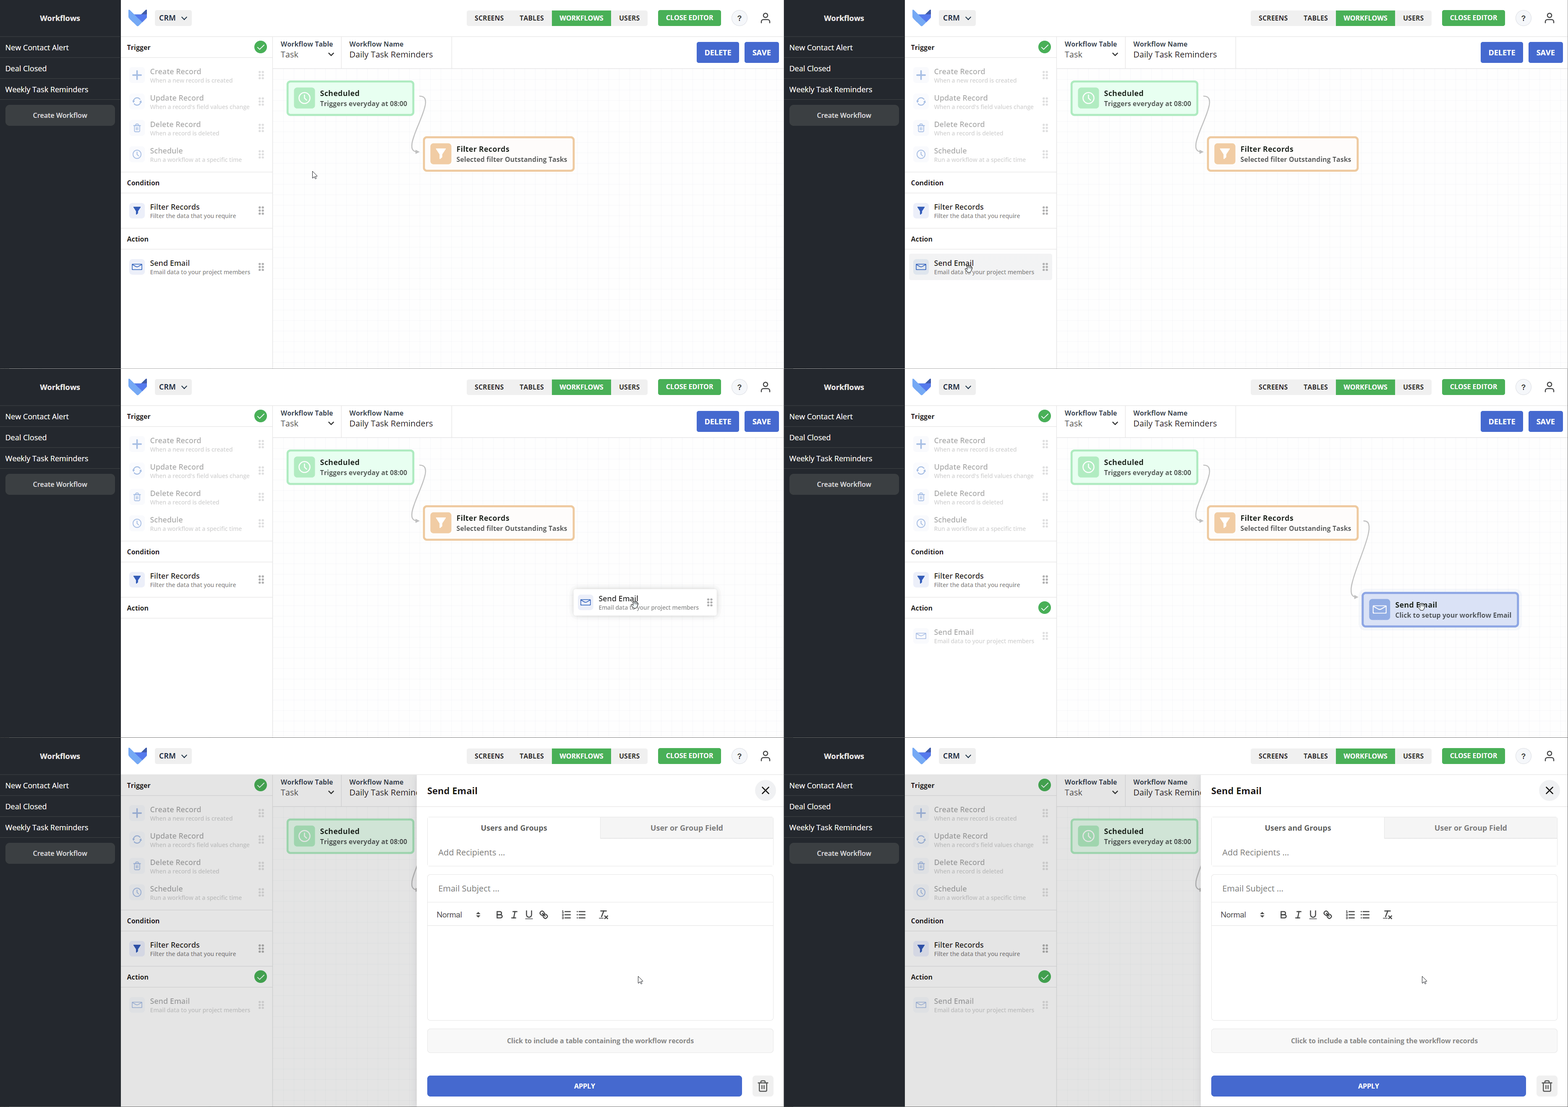
Specifying Email Recipients
The first option to configure is the recipients of the Workflow email. There are two categories of email recipient that can be chosen:
-
Specific Users or User Groups
This sends the email to the defined list of recipients. The recipient will be the same regardless of the Record that triggered the Workflow.
An example of this would be sending a notification of a new hire to the HR Group.
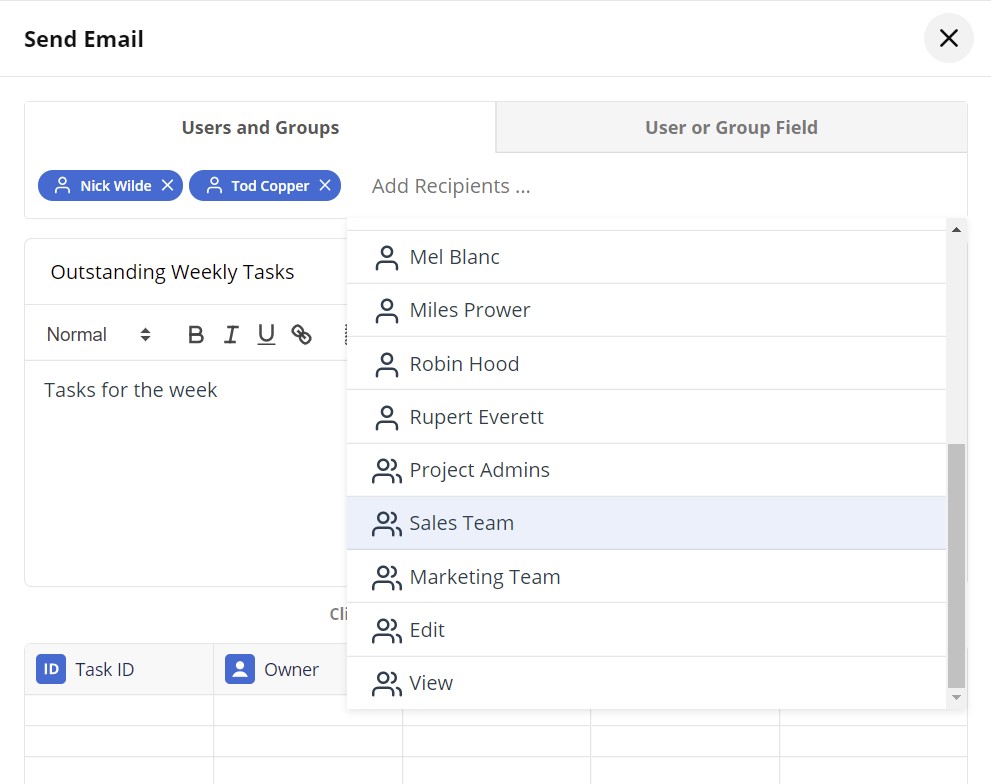
To set the recipients, select the Users and Groups tab then click in the Add Recipients menu. Select the desired recipients from the list.
-
User or User Group in a Field on a Record
This sends the email to whichever User or Group is selected in a specified Field on the Record (or Records) which triggered the workflow.
For example, you could send a new task notification to the task owner, where Owner is a Field on the Task Record.
To set the recipients, select the Users or Group Field tab then click in the Select Field menu. Select the desired recipients from the list.
NOTE
You can set the email recipient to be either a User or Group, or to be based on a User or Group field. You cannot select both a specific User recipient and a User based on a Field.
Collate Results by Recipient Setting
In the case of a scheduled Workflow, you can select to collate the results by recipient.
This means that each User will receive only one email for all the Records where they are in the selected User field. In the example above, if the User had three tasks assigned then they would receive a single email for the three tasks.
Unchecking this option will mean that a User receives an individual email for every Record included in the Workflow where they are the User in the specified User Field. In the example above, if the User had three tasks assigned then they would receive three emails, where each email is for each one of the tasks.
Defining Email Subject & Body
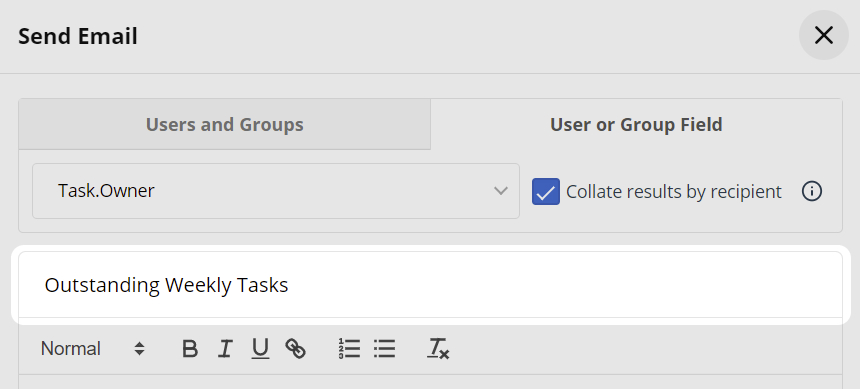
Set the subject for the email in the Email Subject text box.
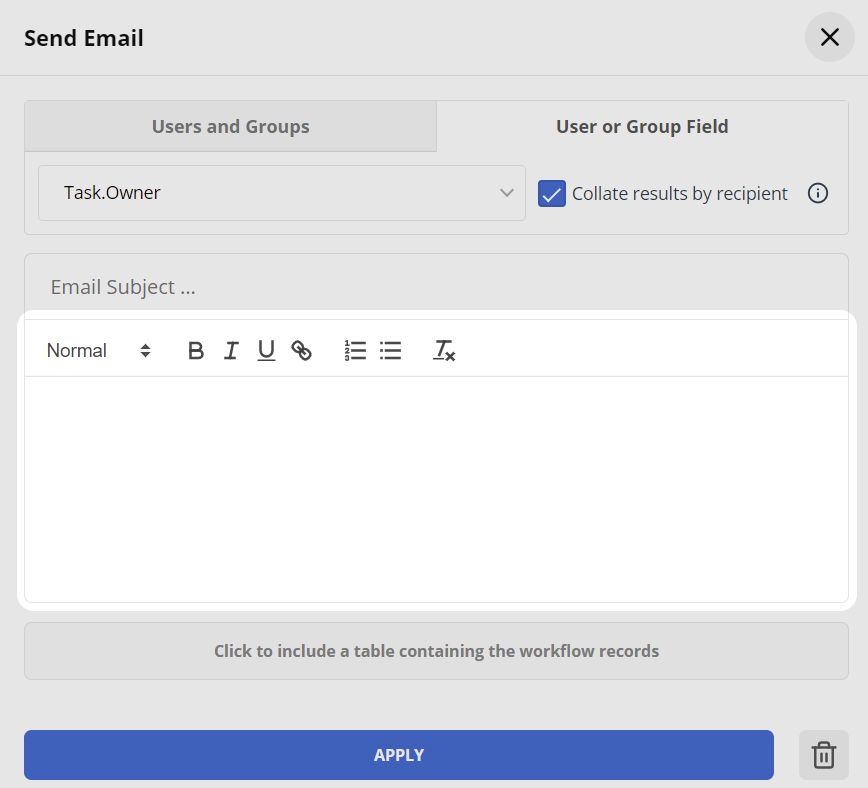
The body of the email can then be defined below. You can use the formatting tools provided to change the layout of the email for the recipients.
TIP
There is a 10,000 character limit on email body content.
Including Records in Email Body
You can optionally select to include Record information in Workflow emails. This gives the email recipients quick access to the Records that they need to review.
For example, if you are sending a weekly task reminder to your team, including the Records in the email will allow them to see at a glance what they have outstanding rather than needing to navigate to the correct view in Gridfox. The email will also include a link to each Record so they can quickly navigate and update the Records as required.
If you select to include Records for a Workflow with trigger type Create Record or Update Record, then the Record table will include just the Record that triggered the Workflow itself.
If you select to include Records for a Workflow with a trigger type of Schedule, then the Record table will include all Records from the Table which match the Saved Filter used in the Filter Records step. Where you have selected to set the email recipient to be a User or Group Field, each User will receive only the Records which have their User in the specified Field.
To include Records in emails, select the link below the email body for Click to include a table containing the workflow records.
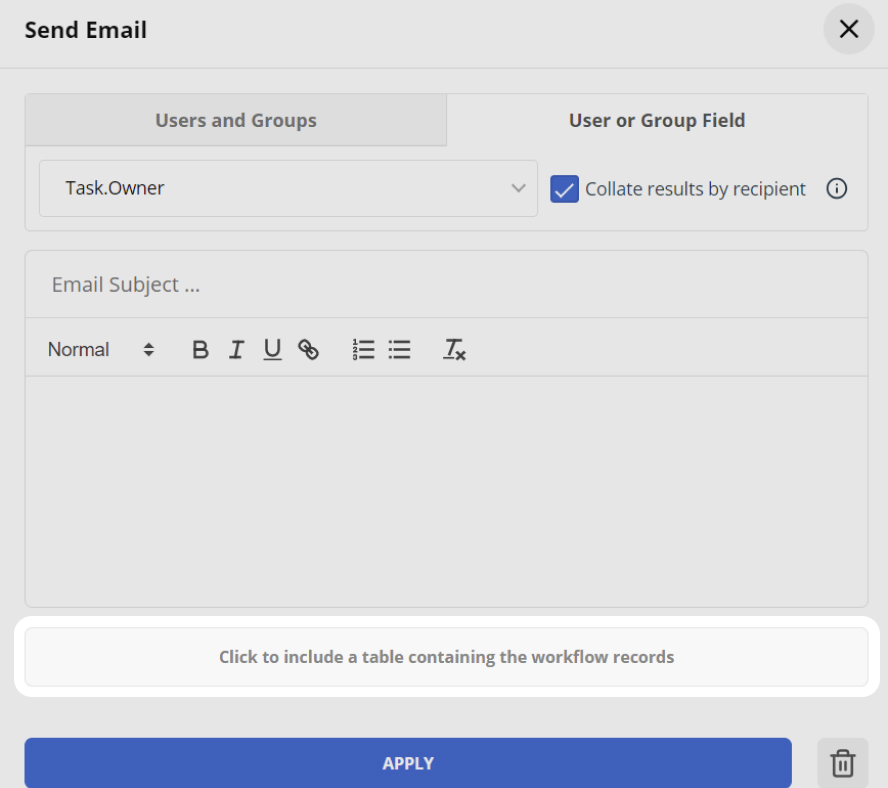
You can customise the Fields from the Record which will be sent in the email by dragging and dropping the Fields.
NOTE
Icon, file and image fields cannot be included in emails.
If the Workflow Table has a linked Parent or Grandparent Table, then you can include Fields from these Tables in the grid of Records.
Once you are happy with the email content, click Apply to close the email settings and click Save in the top right of the canvas.
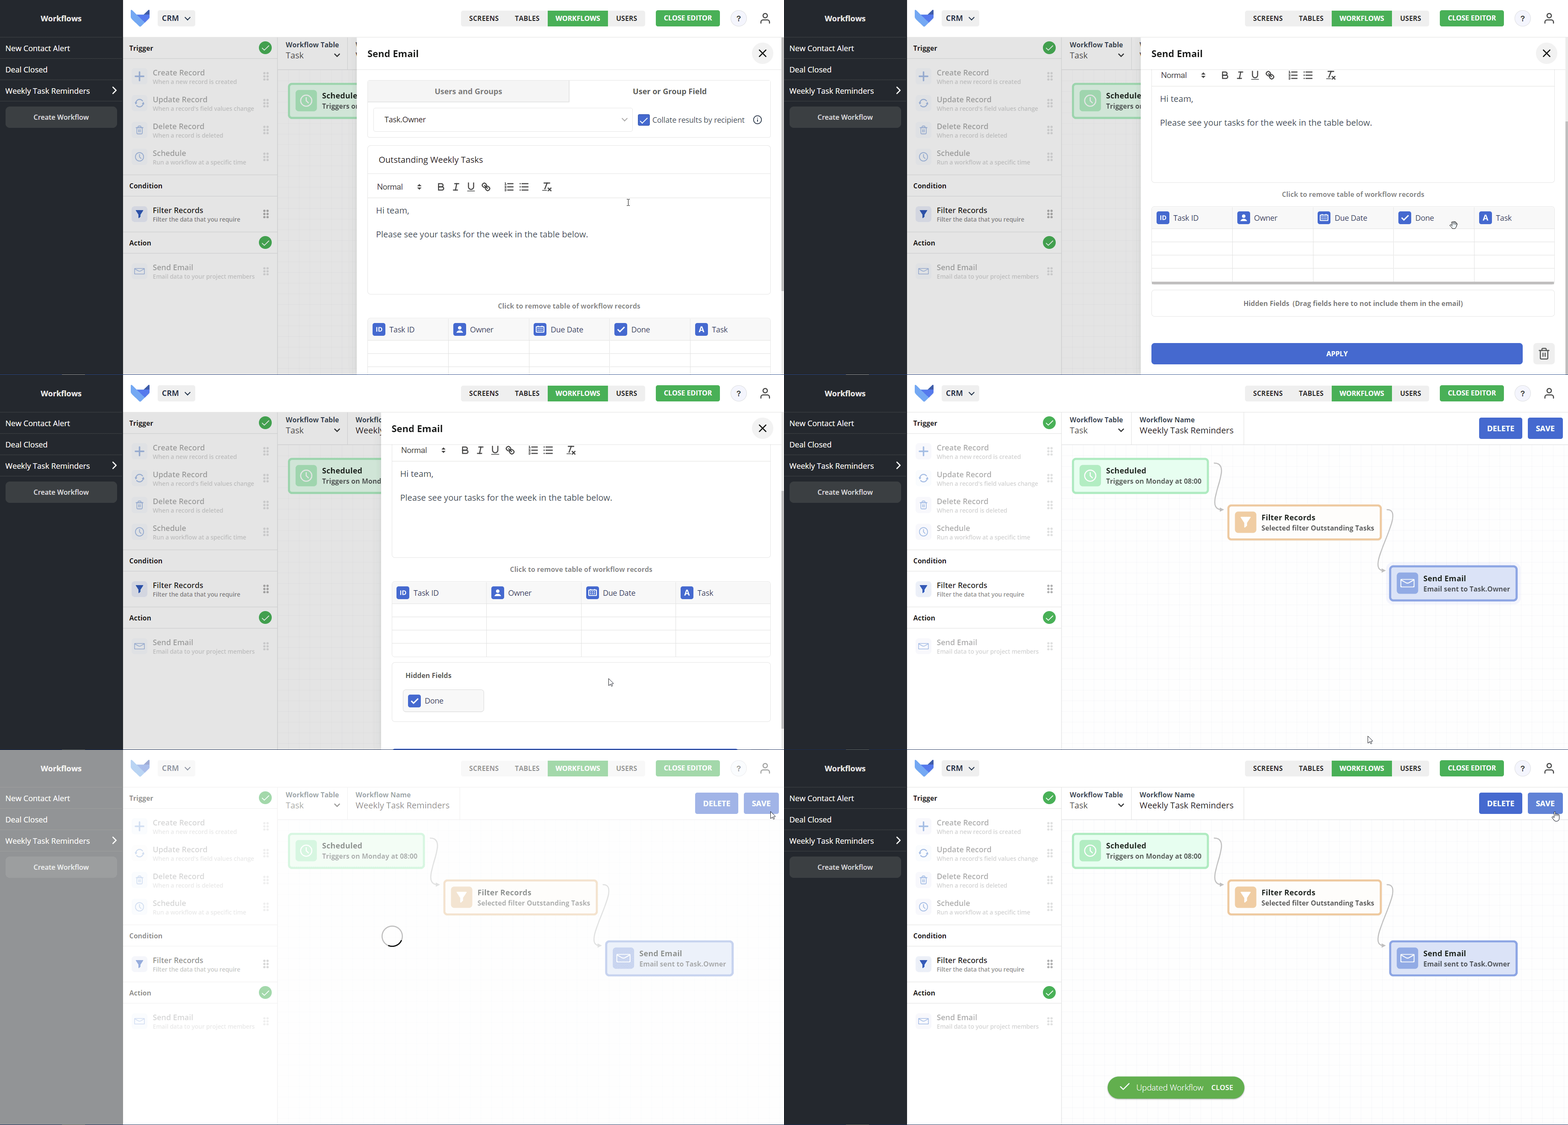
TIP
If the ‘Enable Workflow’ setting is toggled on, your Workflow will be active as soon as you save it so be sure to check the settings before saving.
