Calendar Views
Calendar Views allow you to see your Records plotted on a variety of calendar layouts. This could be useful for:
-
Meeting Schedule
See your upcoming scheduled client meetings
-
Project Timelines
Plot all your projects on one calendar view to see when teams might require some extra support or time
-
Employee Holidays & Sickness
Show a calendar of employee absences divided up by team or group
Gridfox offers two types of Calendar View: the Column and the Grid.
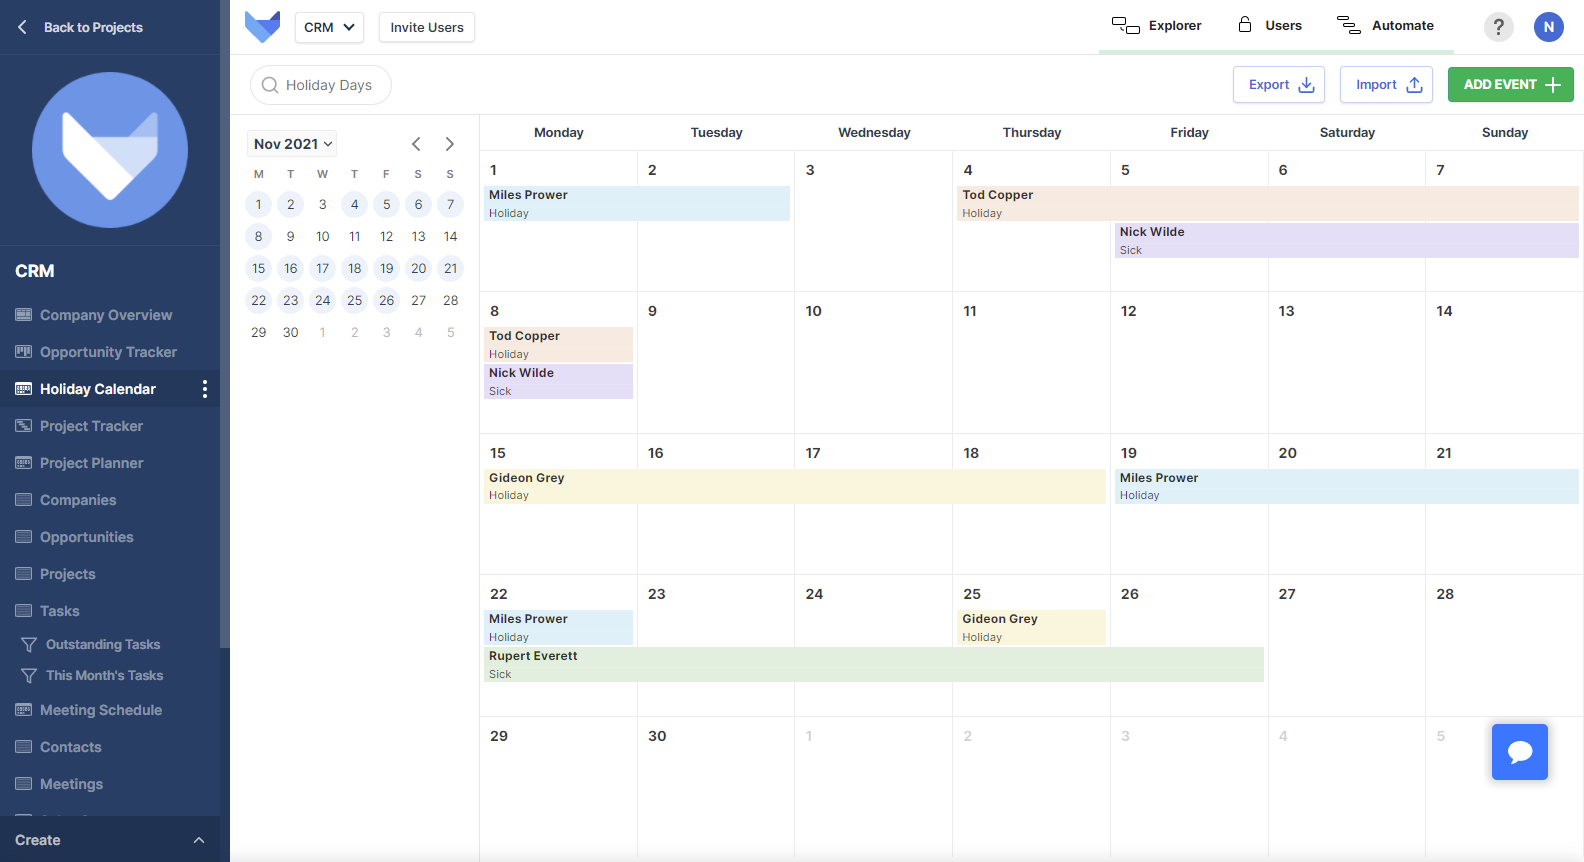
The Grid Calendar shows a month of data at one time.
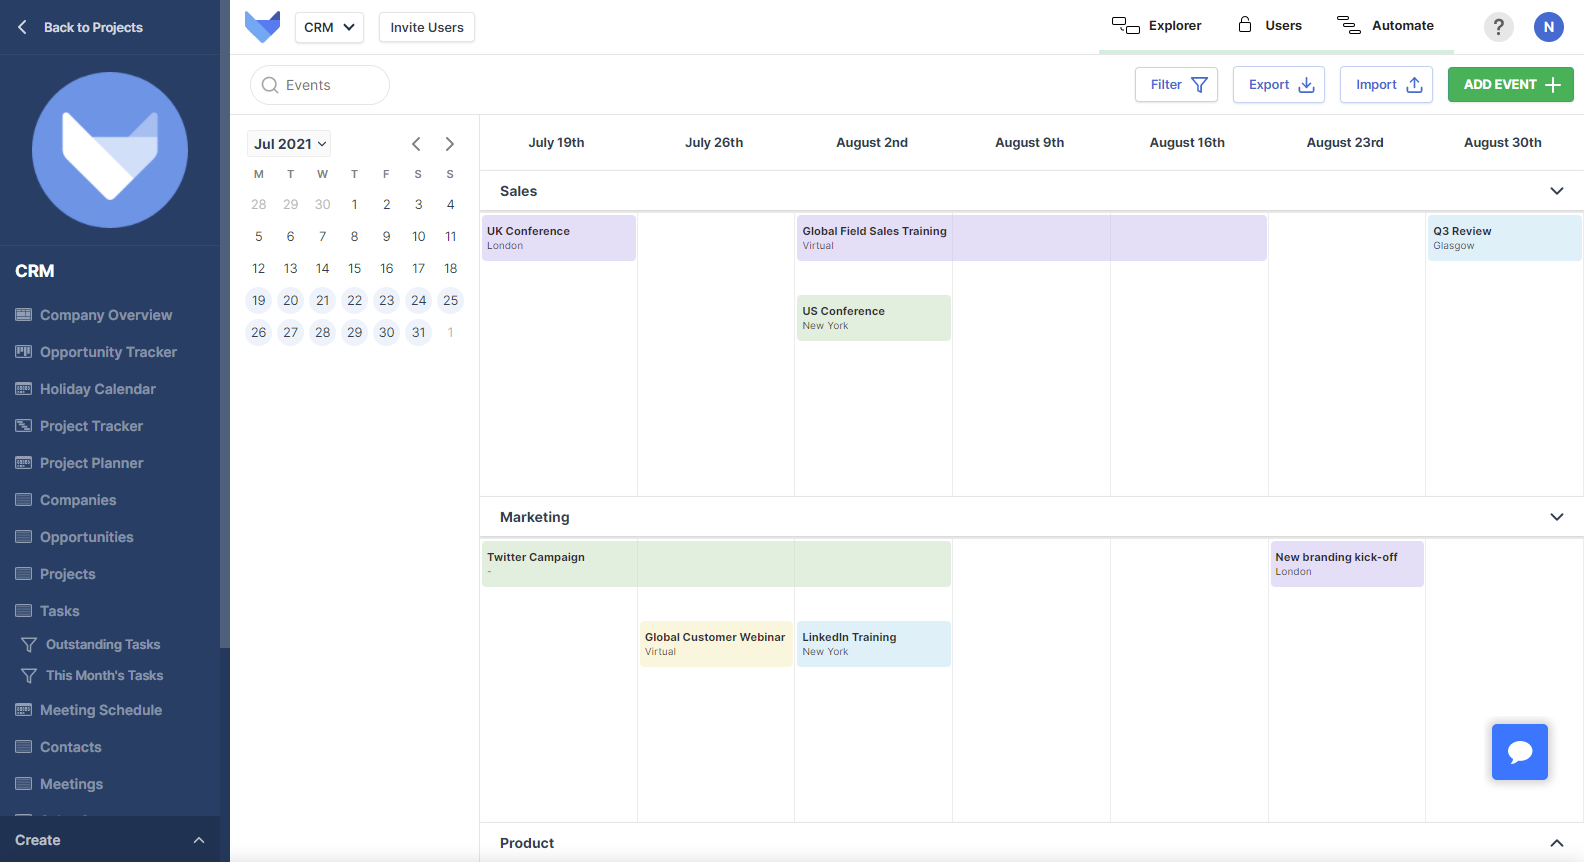
The Column Calendar can be used to show a week, several weeks or several months of data depending on the settings chosen. You can also optionally divide the columns into rows to group the Records.
Creating Calendar Views
- Open the Create menu in the bottom left hand corner
- Click Calendar
- Enter a name for your calendar
- Click the next arrow
TIP
You can use Ctrl + \ to open the Create menu if it is currently collapsed.
The Calendar settings will then be shown in the centre of your screen.
Configuring a Grid Calendar
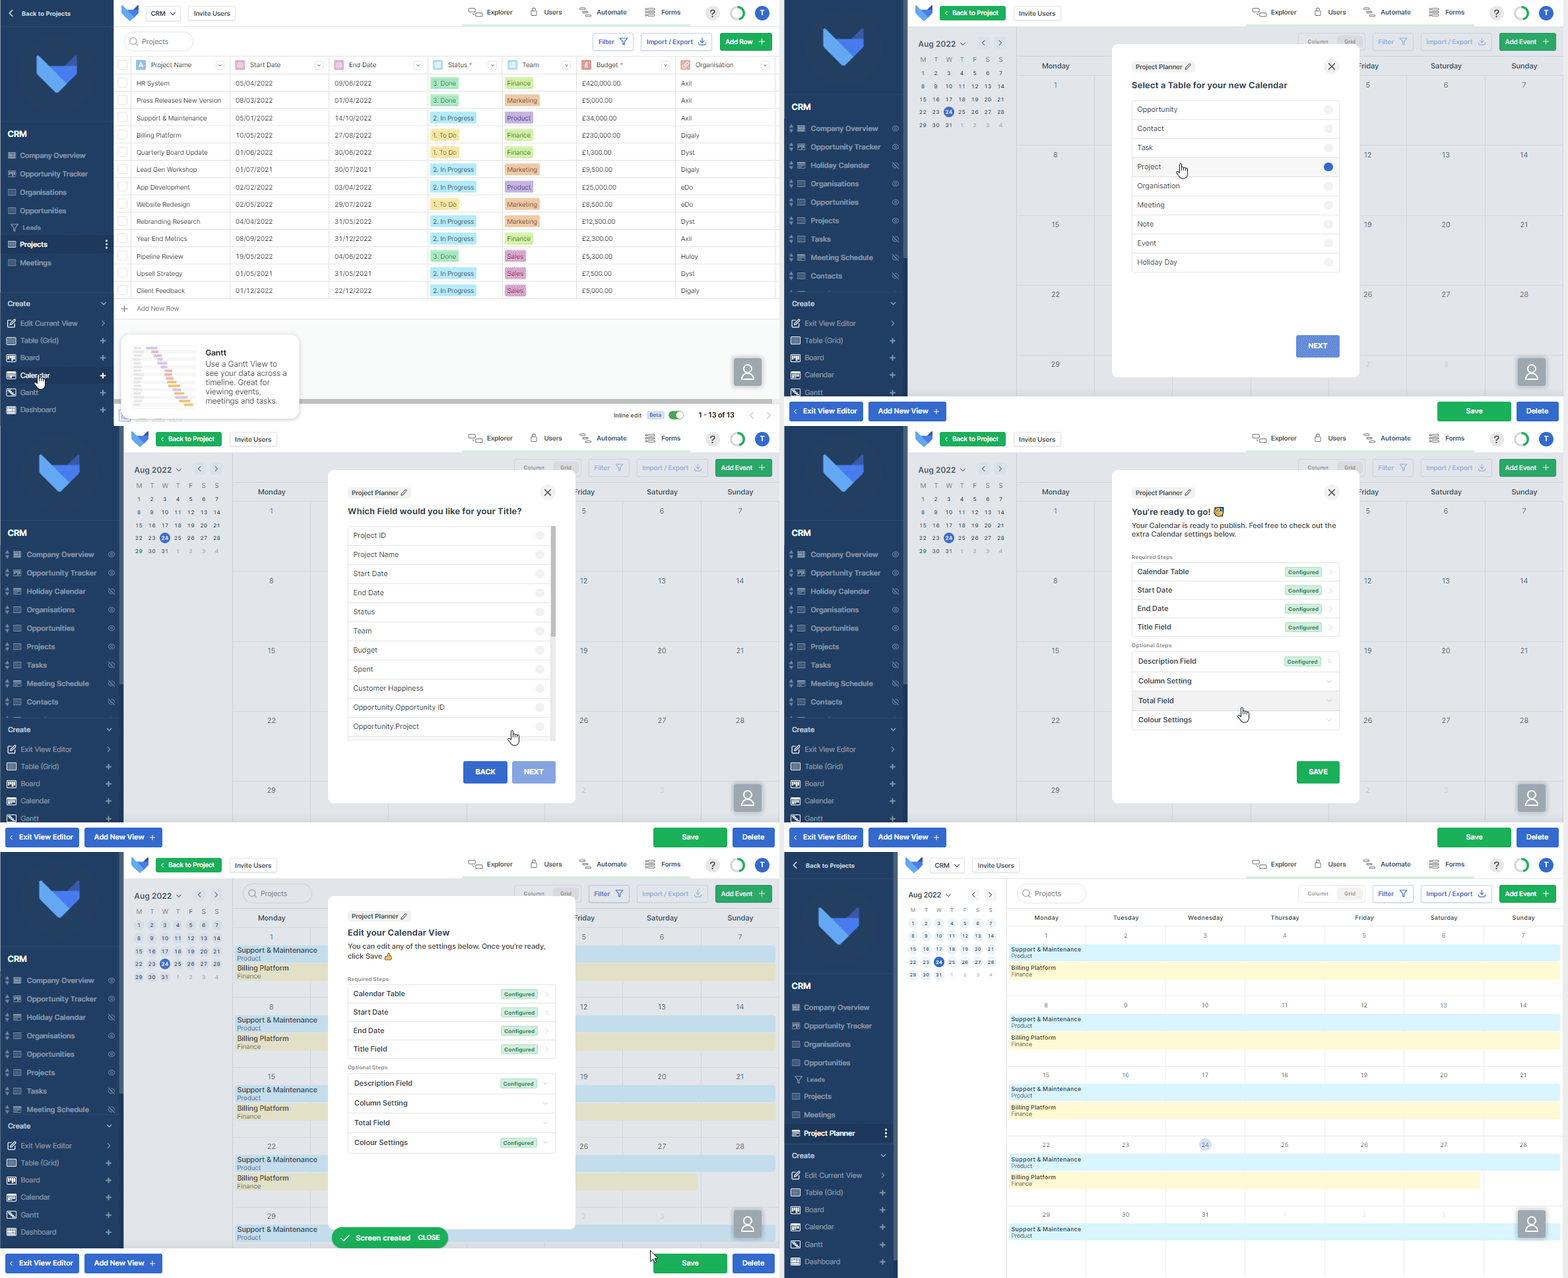
With the Calendar settings panel now displayed on your screen, Users can begin following the step-by-step process to configure the data that they want to show in their calendar. Below are the required steps that every User will go through when setting up their Calendar:
- Choose which Table you want to show Records from
- Choose which Field you would like for your Start Date of each calendar event
- Choose which Field you would like for your End Date of each calendar event
- Choose which Field you would like for your Title
NOTE
you cannot use Icon and Image Fields when setting the Title of your Calendar
Proceeding through these required steps will set your Calendar to a Grid View, as is the preset for Calendar Views. If you wish to configure your Calendar in a Column View, please proceed with the Optional Steps.
Configuring a Column Calendar
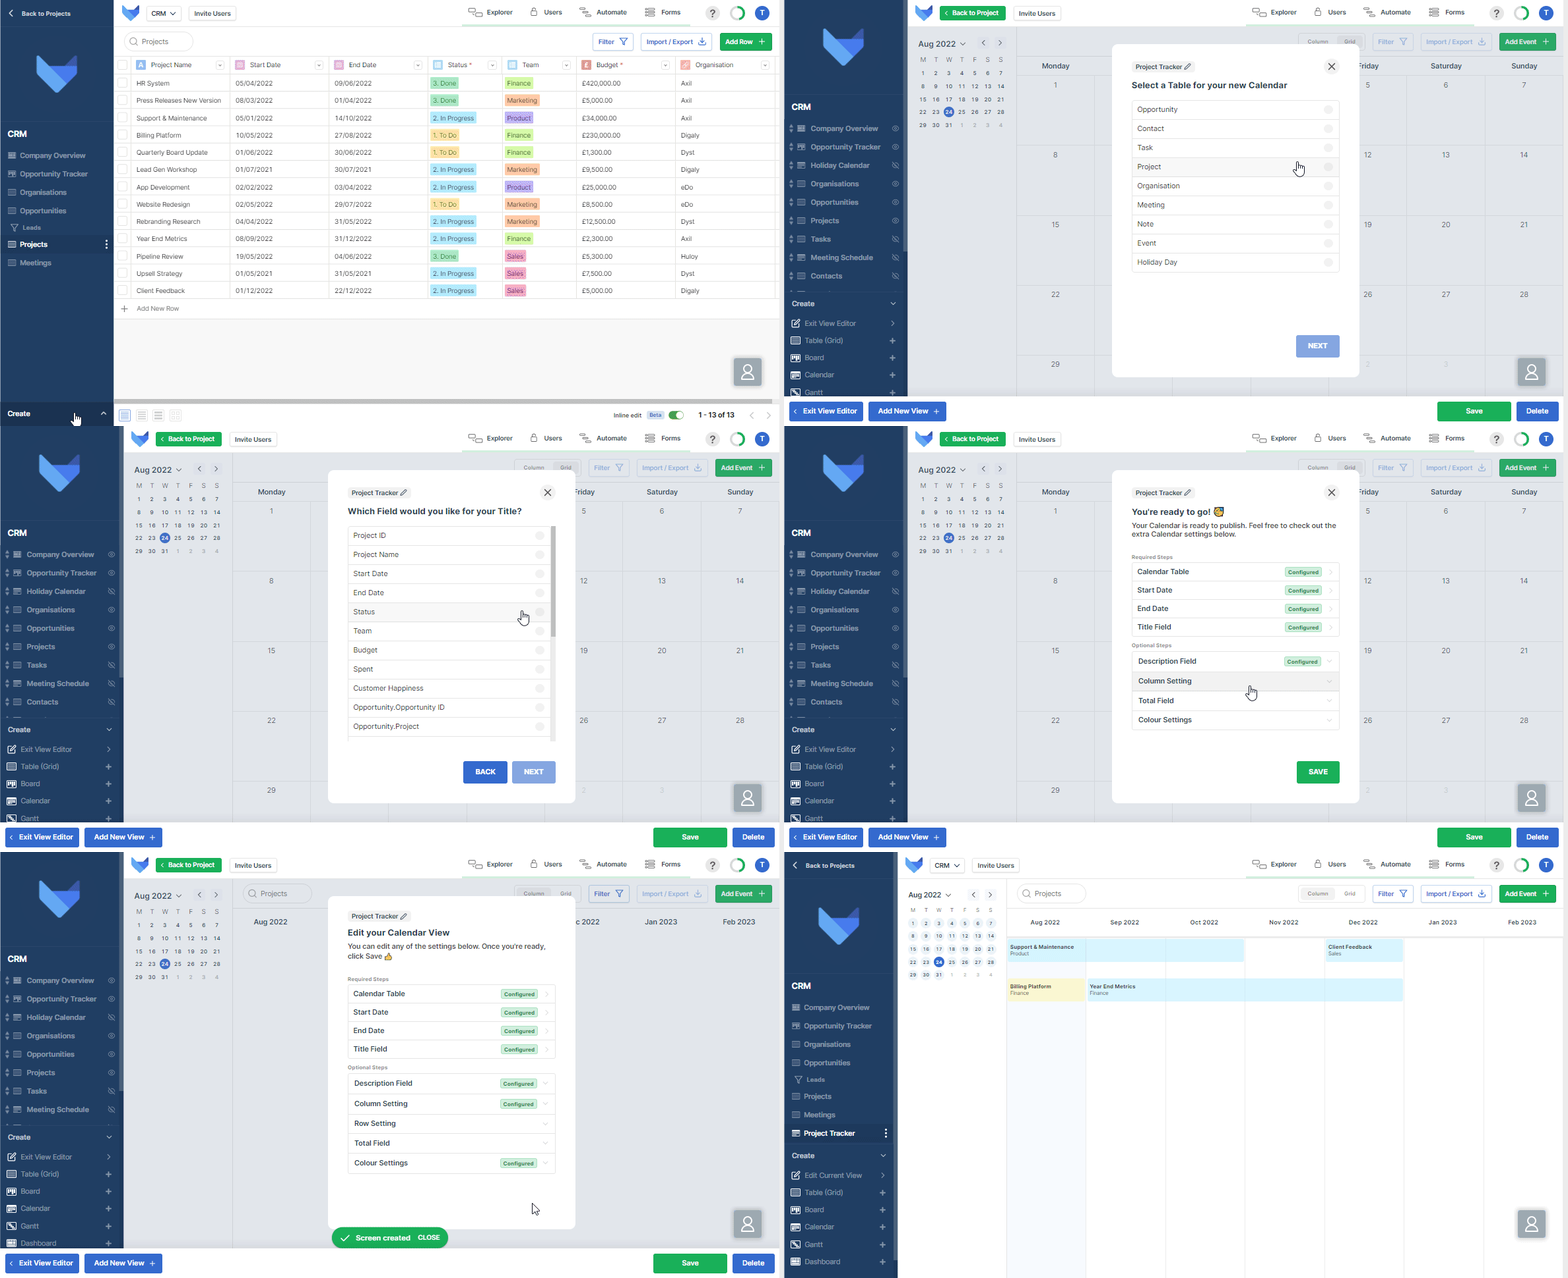
To view your Calendar in a Column format, proceed with the optional Column Settings steps in the Calendar settings panel
-
Column Settings
Choose whether each column should show a day, a week or a month of data.
Optional Settings
There are a series of optional settings that are available when configuring your Calendar View.
- Description Field
Choose the description field that you want to show on event blocks -
Row Settings
Optionally group the Records into rows based on a List Field, a User Field, a User Group Field or Time.
Choosing one of these, except the Time option, will show an additional setting for you to pick which Field should be used.
-
Total Field
Optionally show the total value in a chosen Field for each of the columns. This can be a Money or Number Field.
- Colour Settings
You can optionally colour code each Event on the Calendar based on the value in a List, User or Group Field. Select this in the Colour Settings section.
Once you have finished all the configuration, click Save to create your new Calendar View.
Updating Calendar Views
Calendar Views can be amended at any time.
Click Edit Current View when you are looking at the Calendar. Alternatively, open the View menu and click Edit.
TIP
You can use Ctrl + space to open the View Editor.
Make any changes that are needed and then click the Save button. Changes will take effect immediately for everyone in the Project.
Renaming a Calendar
To change the name of one of your Calendars, amend the Title in the grey box at the top of your calendar settings panel.
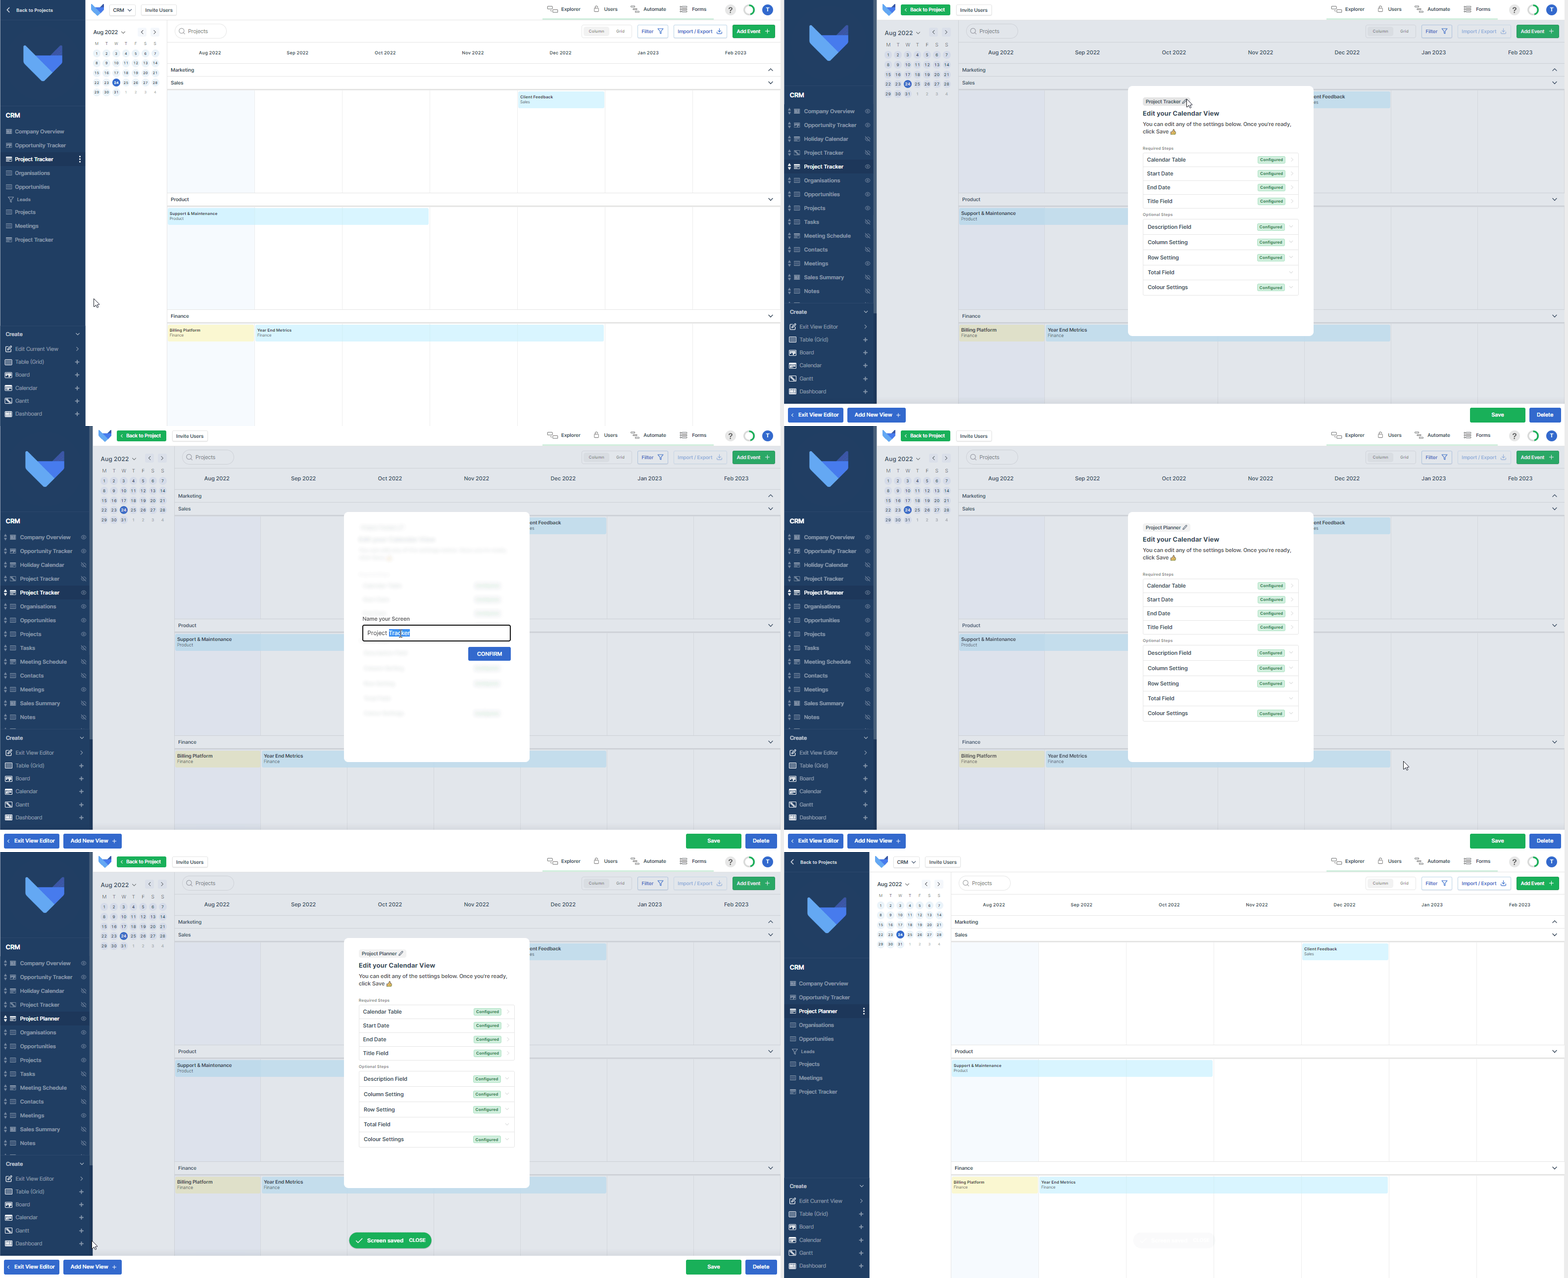
Deleting Calendar Views
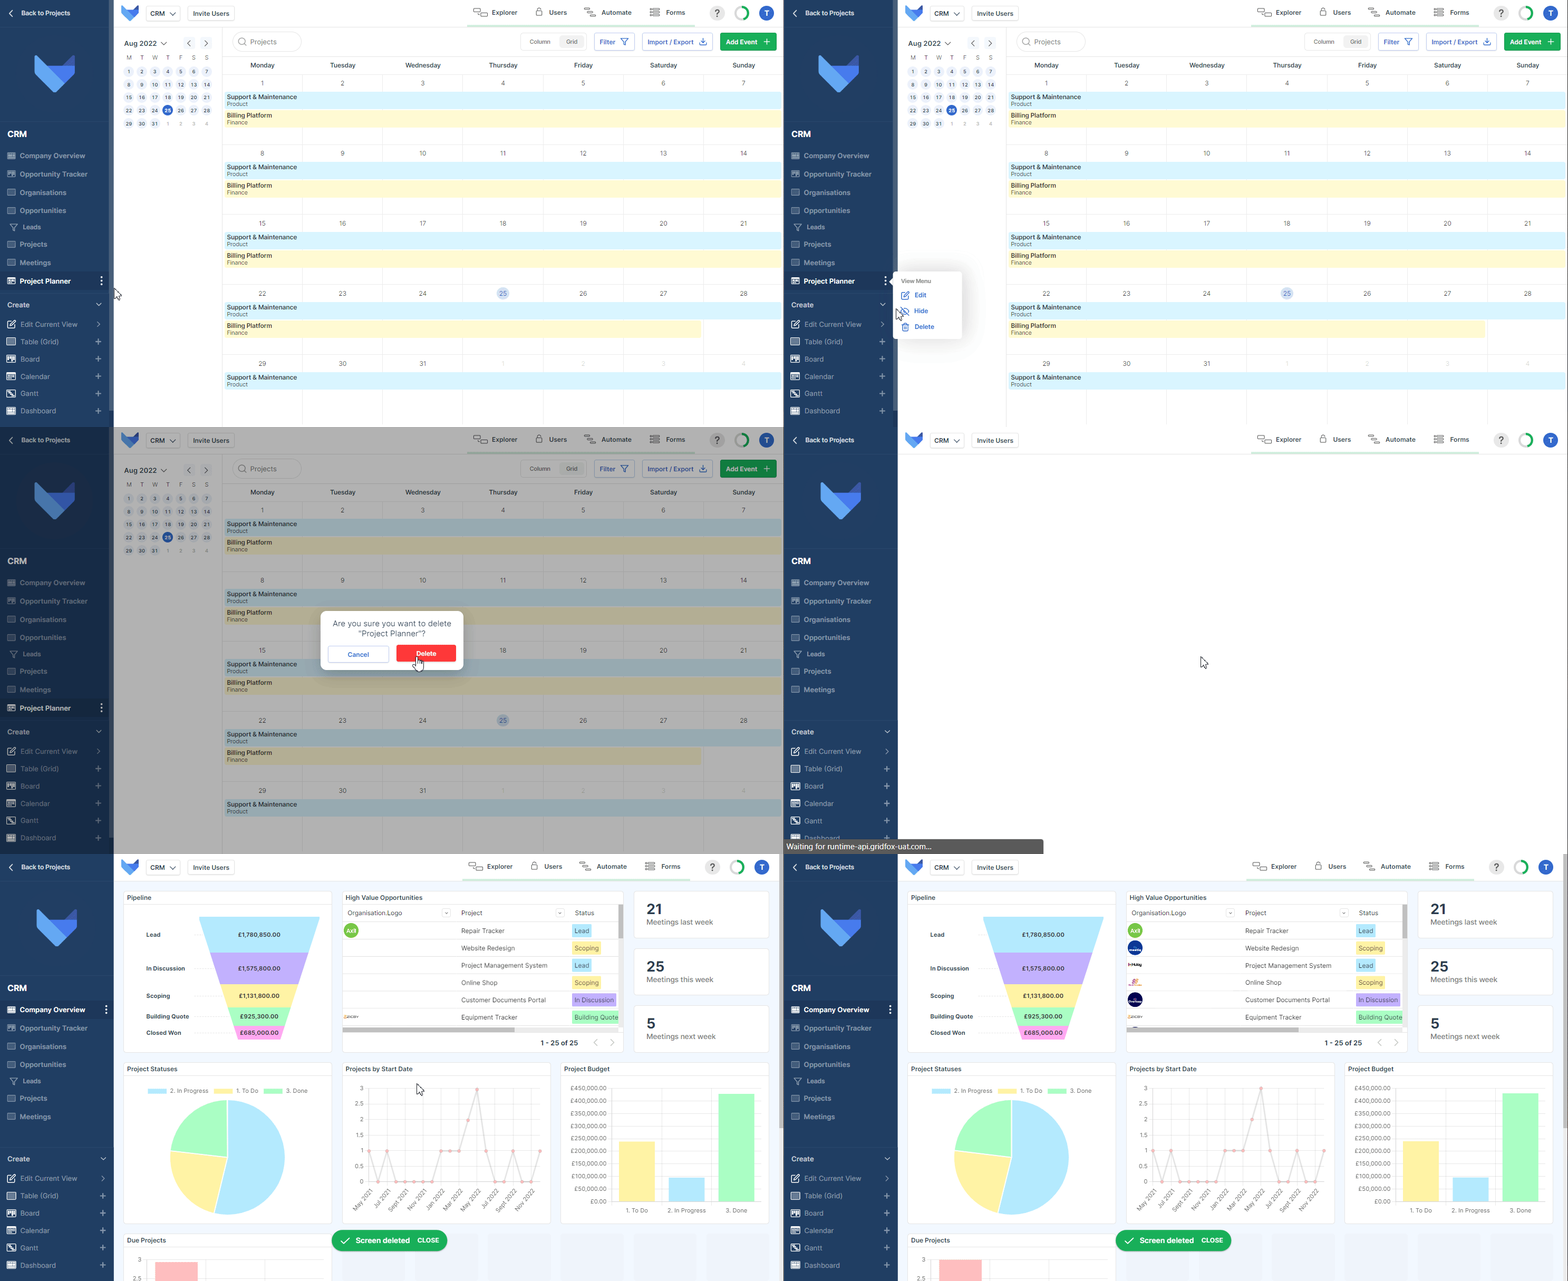
To delete a Calendar View, open the View Menu for the Calendar in the navigation bar and select Delete. Confirm the action by clicking Delete again (see below).
Alternatively, select the Calendar View in the navigation bar and click Edit Current View.
Click the Delete icon in the top of the settings panel. Confirm the action by clicking Delete button.
NOTE
Deleting a Calendar View cannot be undone.
